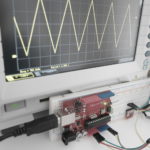
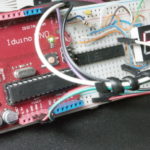
Interfacing MCP4725 DAC with Arduino
In this post I’ll show you how a 12 bit DAC model MCP4725 can be connected and controlled by Arduino or a compatible board. Similar design based on Raspberry Pi platform can be found at this link . Wire.h and ...
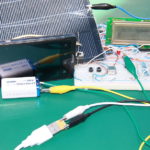
Solar Power Mobile Charger
Solar power mobile charger can be built by tweaking digital power supply schematic. The Software/Hardware stayed almost the same as the original circuit.Current design has the same overcurrent protection and output voltage can be changed by pressing SW1. Voltage and Current ...
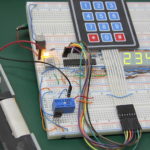
Electronic Lock
Here is a modified and improved electronic lock design. For Arduino version click here.It is largely based on Digital Lock article, however this time a real electronic lock was used instead of a solenoid. The code is a 4 digit number ...
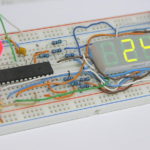
Arduino 7-Segment LED Display MAX7219
MAX7219 is a serial input/output common-cathode display driver. It can interface the microcontroller to 7-segment numeric LED displays, bar-graph displays, dot matrix display or individual LEDs. This IC has some very useful features like built in decoder, multiplex scan circuitry, ...
Response Time Meter
If you ever thought how fast you can react to external stimulus here is the circuit that can measure your response time. It measures the time it takes for you to press the push button in response to turning the ...
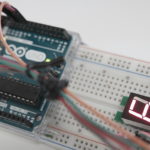
Arduino with 74HC595 and 7-Segment
74HC595 is a discrete shift register IC that can be easily integrated with Arduino platform. Usually shift registers are used to convert a serial data to a parallel output. Additional shift registers can be connected in series extending the number ...

Raspberry Pi 3 Digit LED 7-Segment Countdown Timer
Multiplexing 7-Segment display scheme with Raspberry Pi as described here can be used as a basis for more complex projects. By adding 4x4 keypad matrix and replacing individual 7-Segment displays with a common anode 4 digit 7-Segments module a simple ...
Thermocouple Amplifier MAX31855 with Arduino
Interfacing a Thermocouple with Arduino platform can be easily done by integrating a MAX31855 to your project. This IC is a Cold-Junction Compensated Analog to Digital Converter amplifier especially design for use with a Thermocouple. The converter provides 14-Bit of ...
Sine Wave with MCP4725 and Rasperry Pi
Generating Sine wave is a relatively simple task. It can be done by adding MCP4725 12bit DAC to Raspberry Pi. For Arduino version based on PCF8591 IC click this link. This setup is based on I2C interface and works by ...
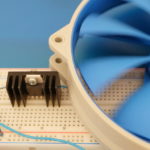
Controlling PWM Fan with PIC16F684
In this post I’d like to share a design of PWM Fan controller based on PIC16F684 MCU. For Arduino version click here. Previously I’ve designed similar circuits some of them more complex than this one. I recommend you to look ...