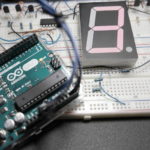
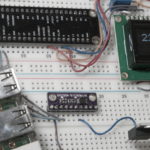
7-Segment LED Display PCF8574 I2C Arduino
Adding a serial data transfer capability to a 7-Segment LED Display can be done by using PCF8574 I/O Port expander with I2C interface. Arduino UNO controls the PCF8574 by sending display codes for each segment. Similar circuit based on PIC16F876 ...
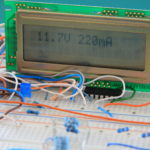
Power Supply 2.5 – 12 V
Power Supply is probably the most common electronics project you can build.This is a basic design for digital power supply. It was built around 3 main components. Digital potentiometer – MCP4251-502E/P, Low Dropout Voltage Regulator – MIC29152 and PIC16F877A.The idea ...
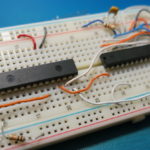
Interfacing MAX7219 with PIC16F876 microcontroller
MAX7219 is a common cathode display driver with a simple serial interfaces that can be easily connected to a microcontroller. Among other useful features this IC has built in brightness control and scan control capability that allows to limit the ...
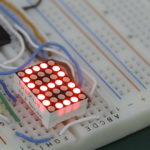
7×5 Dot Matrix Character Generator
In this post a basic character generator design based on PIC16F88 will be demonstrated. 7x5 Dot Matrix Display was used and its pin out is shown in the schematic below. Instead of using PIC16F876/7 microcontrollers PIC16F88 was chosen for this purpose ...
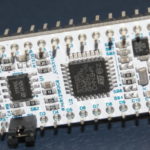
LED Blinking STM32L011K4
All my previous project were based on PIC microcontrollers or Arduino board, however recently I’ve been experimenting with STM32 MCU. For this simple project a NUCLEO board based on STM32L011K4 MCU was used. The STM32 Nucleo-32 board provides a simple ...
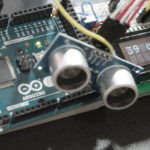
Arduino Ultrasonic Sensor HC-SR04
This post is about building a distance meter using HC-SR04 Ultrasonic Sensor and Arduino MEGA board. For PIC16F877 version click here. Raspberry Pi variant is also available at this link. HC-SR04 module can measure distances ranging from 2cm – 400 ...
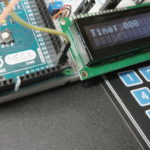
LCD Countdown Timer Arduino
This post is about building a 3-digit countdown timer based on Arduino MEGA. Up/Down counter also available at this link. The timer will wait for 3-digit number to be entered via 4x3 keypad and then start counting down to zero ...
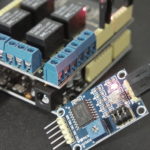
Arduino Photoresistor Relay Control with PCF8591 Module
Relay controlled by light intensity can be implemented using Arduino UNO compatible board. In this case Keyestudio UNO R3 and AD/DA module with PCF8591 chip. Similar simpler design is available here. On this particular module a photoresistor and a potentiometer ...
LM35 Temperature Sensor with Raspberry Pi
Using LM35 temperature sensor with Raspberry Pi is a relatively simple task once you have a way to read and convert analog signals. Fortunately in my previous project I’ve shown how to build a basic Raspberry Pi voltmeter with ADS1015 ...
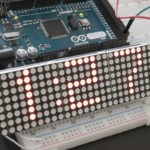
4-Digit LED Dot Matrix Clock Arduino
Here is another digital clock design based on Arduino platform. This time it uses 4-Digit LED Dot Matrix module to show the time. Similar design with LCD display is available here. The Dot Matrix module consists of four MAX7219 chips ...