
All my previous project were based on PIC microcontrollers or Arduino board, however recently I’ve been experimenting with STM32 MCU. For this simple project a NUCLEO board based on STM32L011K4 MCU was used. The STM32 Nucleo-32 board provides a simple way to try out new concepts and build prototypes with the STM32 microcontroller. You can find many variants of these boards. They have similar construction and differ only by target device. Some have Arduino compatible connections and make it easy to expand the functionality of the STM32 Nucleo board to allow the use of Arduino shields.

ST microelectronics also provides development and debugging IDE for STM32 MCU like Attolic True STUDIO and Cube MX to help in development of high-quality embedded software. For this basic design you’ll need to download and install these programs. As the first step open Cube MX and create a new project and select your board.
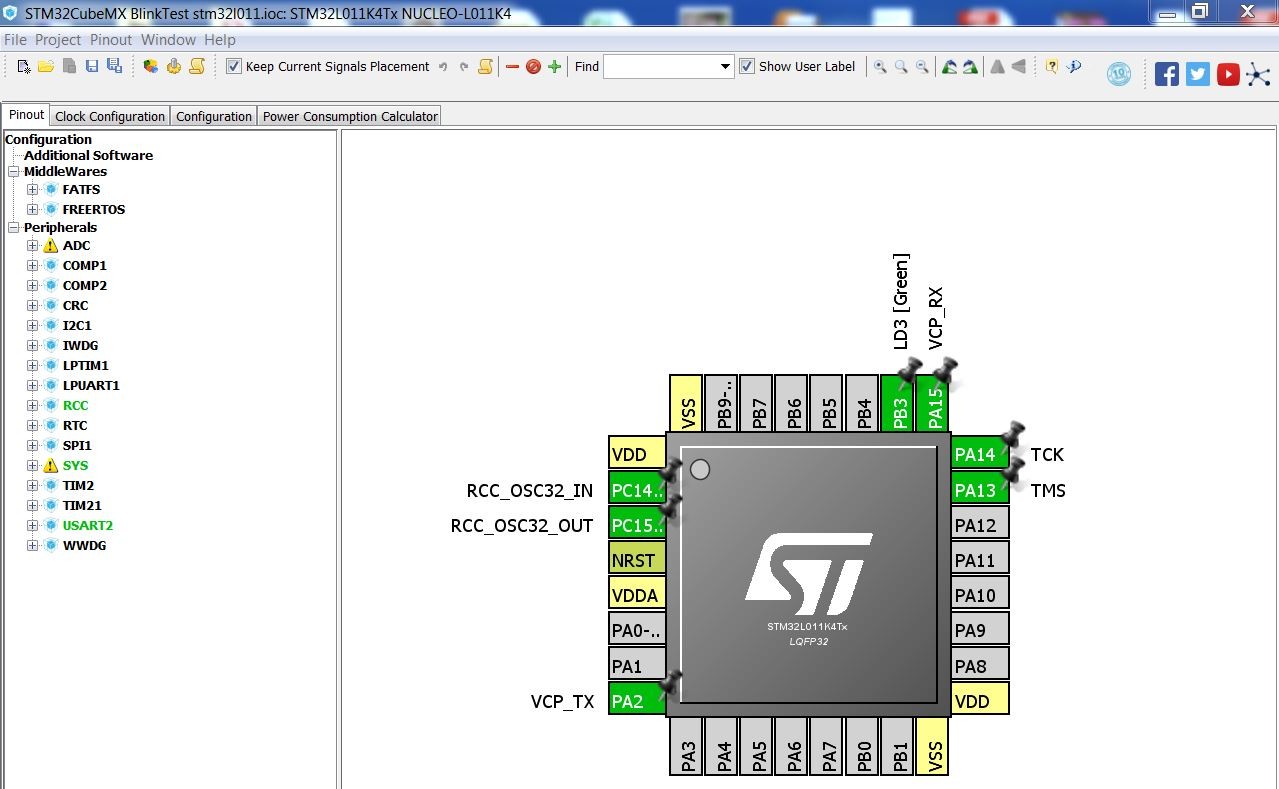
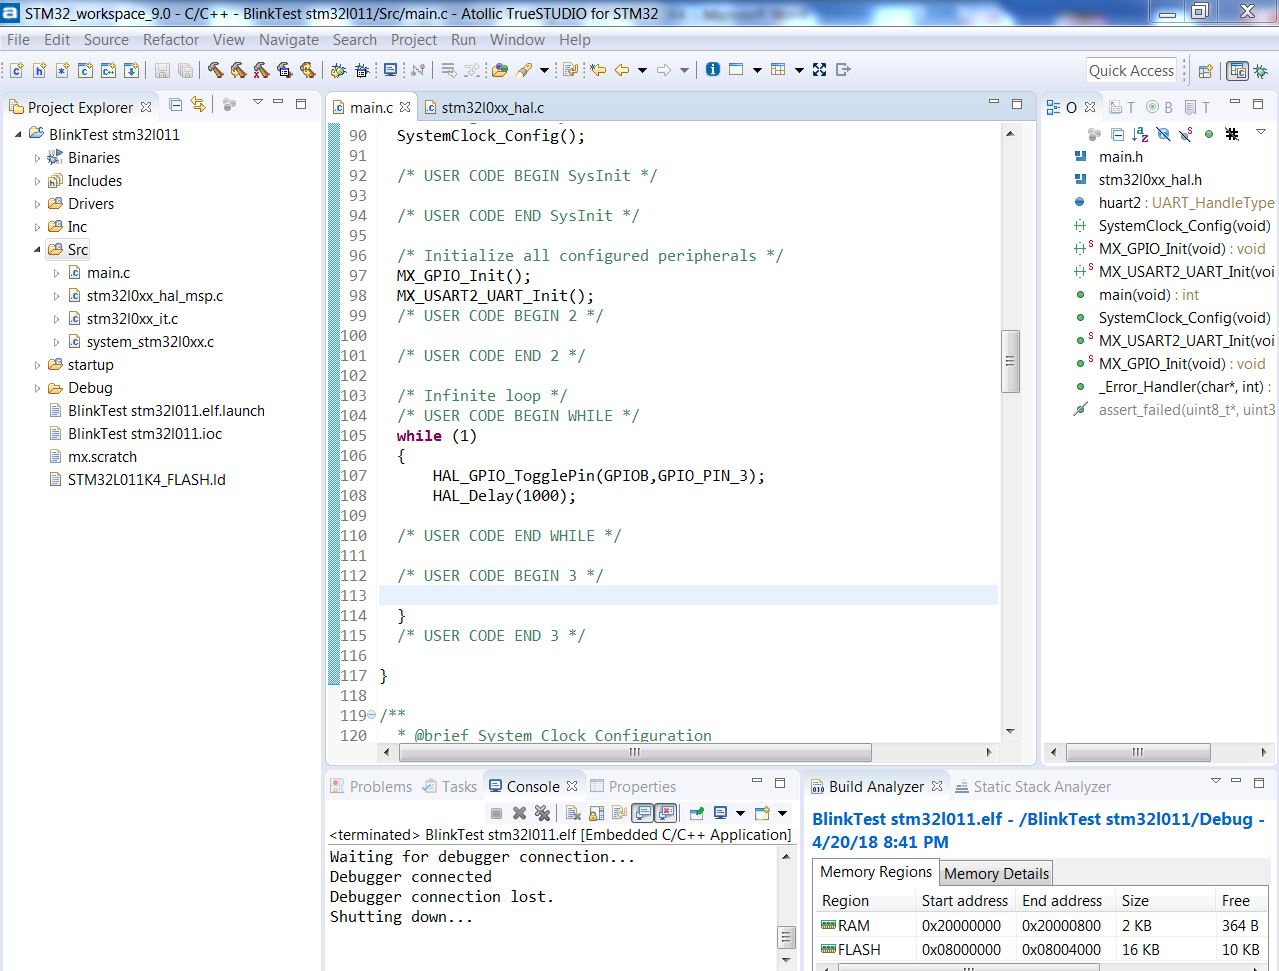
Verify under Configuration tab that I/O with connected LED is defined as push pull low speed output, for NUCLEO-L011K4 it’s RB3 pin. Now under Project tab click Generate code and your basic project structure will be created. Now you’ll have the option to open your project in Attolic TrueSTUDIO. Under Src category find main.c file and add these 2 lines:
HAL_GPIO_TogglePin(GPIOB,GPIO_PIN_3);
HAL_Delay(1000);
Now your code should look similar to this figure.
Now select —> Project build All. Run —> Debug As —> Embedded C/C++ Application. At this point you should see Resume, Terminate and pause button. Click Restart or Resume to run the code. If no errors were found and the board is connected you should see a green LED blinking with 1 sec intervals.