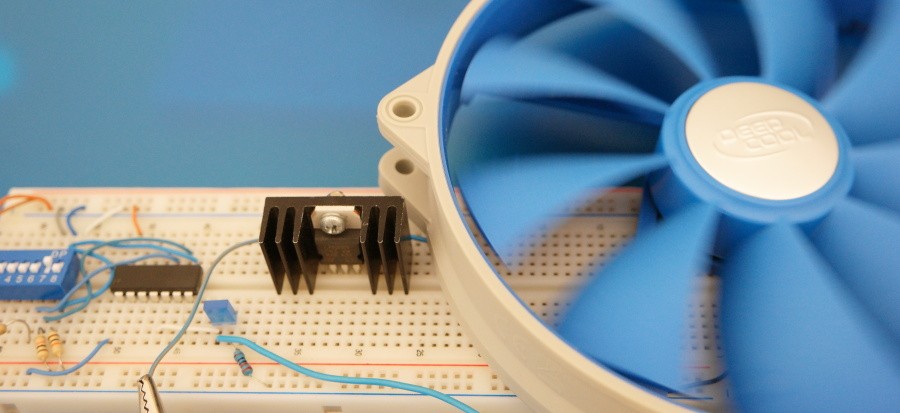
In this post I’d like to share a design of PWM Fan controller based on PIC16F684 MCU. For Arduino version click here. Previously I’ve designed similar circuits some of them more complex than this one. I recommend you to look at this post for additional information and ideas. I wanted to build a simplified version and eliminate additional external components as much as possible. By using PIC16F684 instead of PIC16F877A
you’ll get a smaller circuit, only 14 pins and get rid of external oscillator because this micro controller has a 8 MHz internal oscillator. This circuit can be built on a small strip board inside a PC case. If your motherboard has only one connector for case fan but you need to control additional fans this circuit can be of use. The code wasn’t written from scratch but instead retargeted for current MCU from earlier post. The controlling scheme hasn’t changed much. It uses 12V power supply and PWM signal of 25KHZ generated by PIC to control fan speed. In order to simplify this design only 3 speed settings were defined for the fan. High, Medium and Low and can be selected by DIP switch. Switch is connected to PORTC of the micro controller.
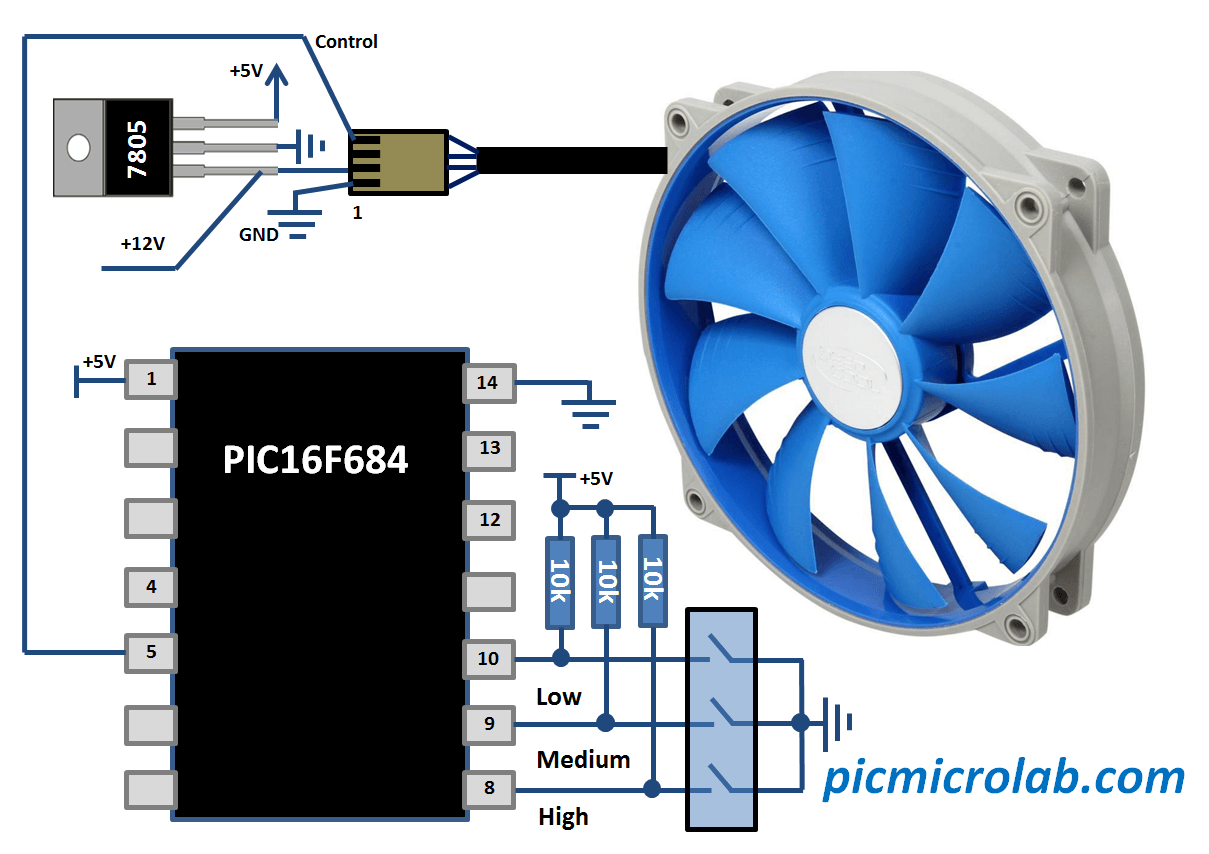
Prototype was tested on DeepCool 140mm UF140 PWM Fan. I have recently built a new PC and purchased this fan. However current design should work on a variety of standard 4 – wire PWM fans. One important thing to remember is that fans have different min and max speeds so the code may need some tweaking to make it work correctly with other fan brands.I’ve used PICKit3
to program the controller. Learn how to connect it at this link.See next pages for more information.