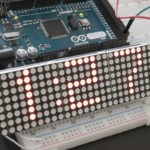
4-Digit LED Dot Matrix Clock Arduino
Here is another digital clock design based on Arduino platform. This time it uses 4-Digit LED Dot Matrix module to show the time. Similar design with LCD display is available here. The Dot Matrix module consists of four MAX7219 chips ...
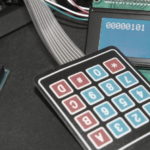
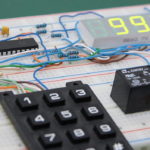
Arduino Base Converter with 4×4 Keypad and I2C LCD
Arduino hexadecimal to binary Base Converter is a simple design that can be built using 4×4 Keypad and I2C LCD display module. Arduino MEGA board was chosen as a target device. This circuit will wait for a single digit to ...
Arduino Electronic Lock
Here is another Arduino based design and this time I’ll show you how a 4-Digit Code Electronic Lock can be built with Arduino Mega or compatible boards. For similar design based on PIC16F877 click this link. The I/O I’ve used ...
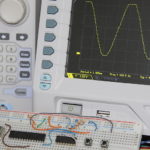
Sine Wave with MCP4725 and Rasperry Pi
Generating Sine wave is a relatively simple task. It can be done by adding MCP4725 12bit DAC to Raspberry Pi. For Arduino version based on PCF8591 IC click this link. This setup is based on I2C interface and works by ...
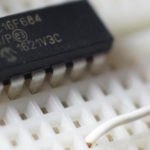
Blinking LED with PIC16F684
This very simple design shows how to make a blinking LED using PIC16F684 MCU. In my previous post I’ve used PIC16F877/86 however most of basic circuits do not require a lot of I/O pins and PIC16F684 small 14 pin package is more ...
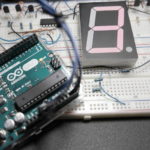
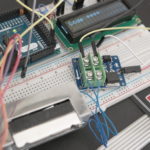
7-Segment LED Display PCF8574 I2C Arduino
Adding a serial data transfer capability to a 7-Segment LED Display can be done by using PCF8574 I/O Port expander with I2C interface. Arduino UNO controls the PCF8574 by sending display codes for each segment. Similar circuit based on PIC16F876 ...
Response Time Meter
If you ever thought how fast you can react to external stimulus here is the circuit that can measure your response time. It measures the time it takes for you to press the push button in response to turning the ...
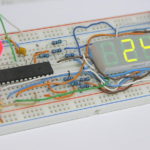
Digital Timer
Digital Timer can be built by using PIC16F876A micro-controller and a few additional components. The schematic is similar to Fan Speed Monitor Design. 3x4 Keypad and 5V Relay were added as you can see from figure below. Only three 7-Segments ...
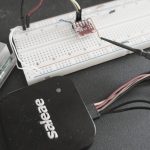
PIC Waveform Recorder
In this article I’ll show you how you can use PIC microcontroller to record and store waveform patterns in its EEPROM memory and replay the sequence later. For this purpose we’ll need a signal/waveform generator to produce the signal, PIC ...
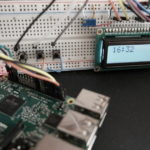
Raspberry Pi Digital Clock with 16×2 LCD
Raspberry Pi based Digital Clock with 16×2 LCD display is a relatively simple project.It requires only a small set of components and can be completed in less than an hour. Previously I’ve published similar designs based on other popular platforms ...